

Available Tutorials:

Tutorial 2: Starting the Application
When you first start the application, a welcome screen displaying the current program version will appear.

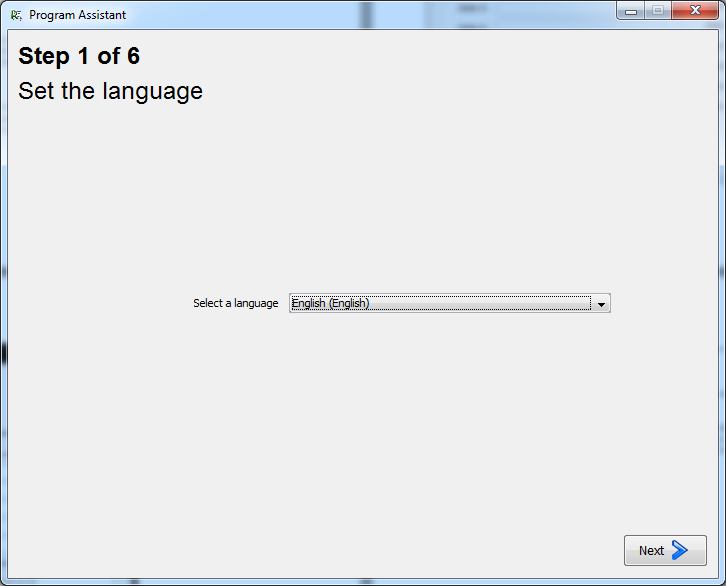
The program recognizes when it is started for the first time and automatically starts a wizard. If this is not desired, you may close the window and skip the process. The wizard can also be accessed at any later time.
To run the wizard; go to: "Settings-> Start Wizard". However, it is advisable to carry out the settings when first starting the application. This information will be applied to your invoice forms.
On the first window of the application you have the ability to set your company name, company address and contact information (email address, phone, website, etc.). There are 10 fields available, which can be filled in according to user’s choice and are printed on the bills. Additionally, the first three fields are printed as the sender’s address in small print on the invoice (it appears in the address window of a normal window envelope).
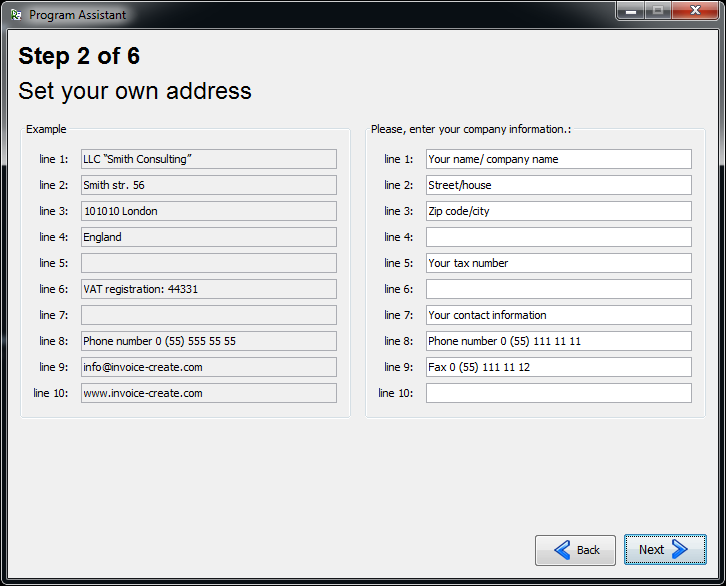
The entries will be set by default for all new accounts. The program offers the possibility to modify or change the information at a later time.
After filling in the fields, press the "Next" button to go to the second window of the wizard.
Here the standard text template for your bills can be set. A text template consists of two parts. The first text is printed on a bill above the table with invoice items (products or services that will be invoiced). Here you should include a salutation and a greeting. The second text box is listed below the table with invoice items.
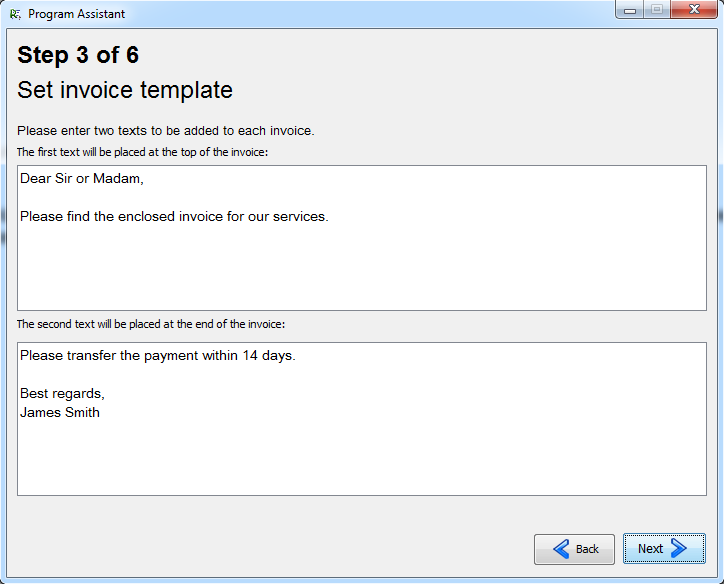
These are just sample texts, you may change these with any invoice to fit your needs.
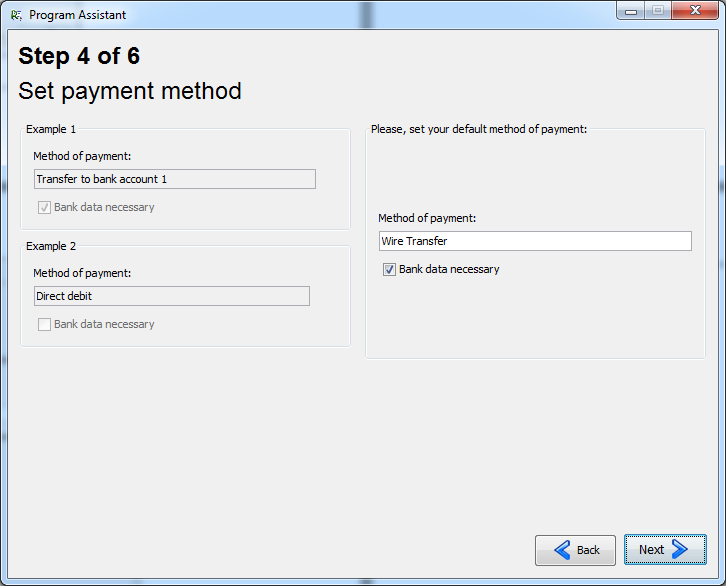
Press "Next" to continue setting up “Invoice Creator.” Here a standard method of payment is determined. This information can also be altered from invoice to invoice.
Each payment method has a name that refers to the type (bank transfer, cash, direct debits, etc.). A selection box, “bank data necessary” will print your bank information directly on to the invoice.
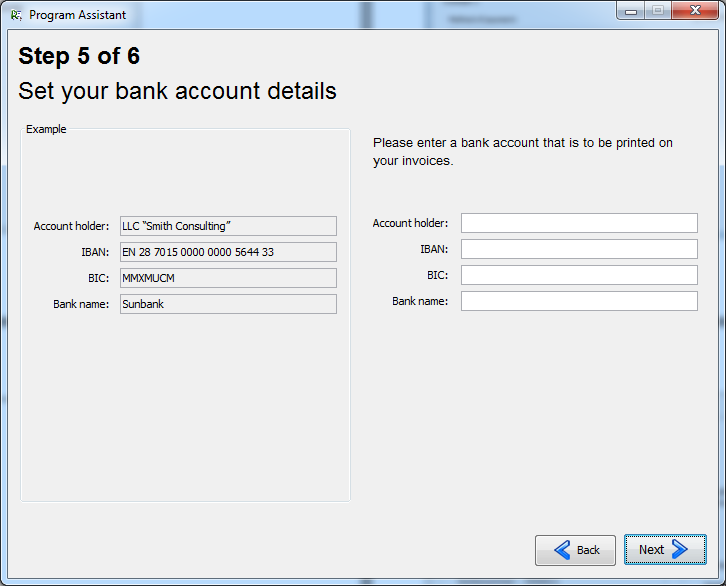
In the next window enter your bank details. It consists of four fields: Account Holder, Account Number, Bank Routing Number and Bank Name. They can also be adjusted later.
In the next window, the business information is listed at the foot of the page. This consists of four columns, which are printed on the bills with small font. To facilitate entering the columns, they are pre-filled with sample values.
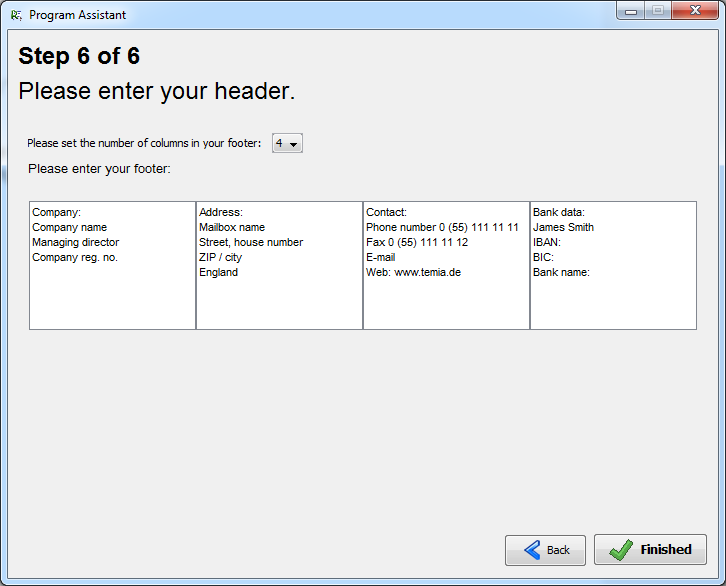
Once all details are added, the button "Finished" appears. This button completes the process and stores the information. In the window shown above, there is a "Back" button available. You may switch to previous windows and review the information again if necessary.
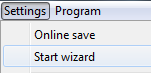
The Wizard can be located later under the menu item - call "Settings> Start Wizard".
Some information can be customized and directly overwrite the accounting dialog. In the "Settings" menu, you can access the individual information and you may change the information provided in the Wizard at any time.