

Available Tutorials:

Tutorial 3: Creating an Invoice
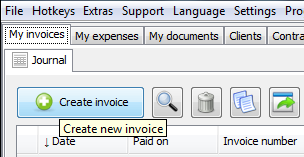
Under the tab "My invoices" there is a window "Journal" with invoices. Here all invoices issued are displayed in a list. It is possible to filter the list according to certain parameters and modify existing invoices.
To create a new invoice, you have to press the "Create invoice" button. Alternatively, you can select the menu item "File -> New -> Invoice" or press the keyboard button F1.
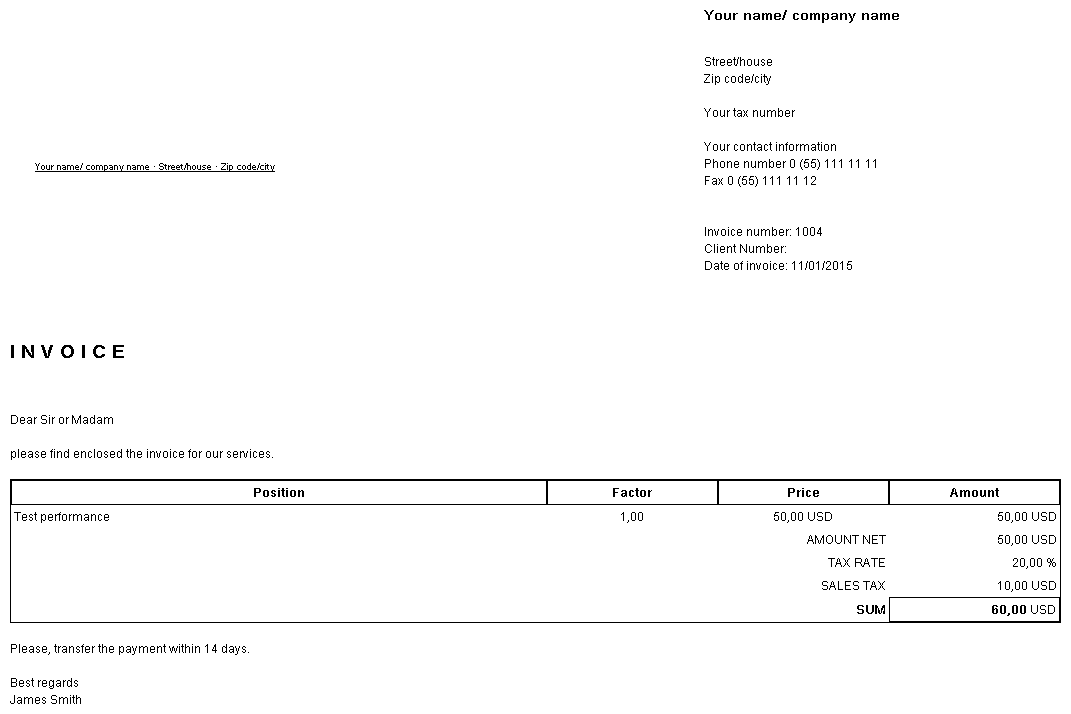
A new invoice is automatically being created. All fields are preset with initial values. You can switch between two different views. On the left side there is an area "View". In "entry fields" mode you can see the invoices with input fields as in the picture below. In "document" mode, the invoice is shown in a print form, such as it would look when printed. When switching into the mode, "document", the invoice is automatically saved. An example of this view can be found at the end of this tutorial.
On the left side there are also several buttons for user actions. For all user actions, such as, turning on the document view or saving as PDF, the invoice is automatically saved/stored. The "Save" button (the disk icon at the far right) also offers the possibility at any time during the processing of an invoice to save it.
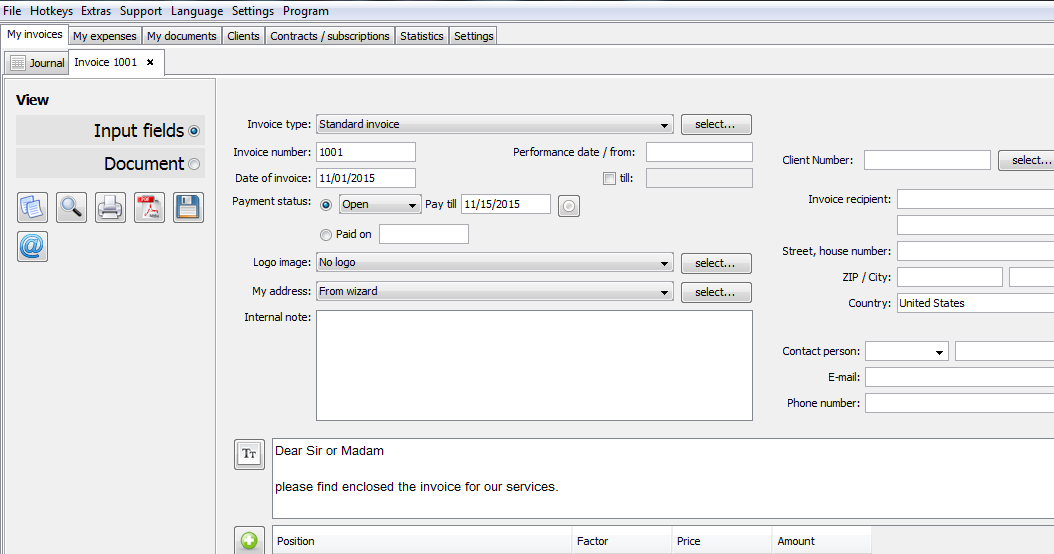
The Title/invoice type field presents a brief explanation of the bill. This field is not printed on the invoice and is used solely as an aid to the user. Later one can filter for this field, to quickly find specific invoices.
The Invoice number field should always be filled out and will be printed on the invoice. The field is pre-assigned with a sequenced number (beginning with 1000). At the same time two invoices with the same invoice number are not allowed. If you try to save a new or existing invoice with a duplicate invoice number, you will get an error message with a corresponding note. Recently assigned invoice numbers can be viewed under the settings of the program or they can be reset.
The field Invoice date is already preset with the current date and will be printed on the invoice.
Each invoice can have a Payment status "open" or "paid". For open accounts, you can specify the payment-due date - the date by which the invoice should be paid. A list of common entries, in addition to the date field helps to quickly calculate/assign a suitable date. The field is preset with the usual payment term of 2 weeks = (current date + 14 days).
If the bill has already been paid, a payment date is required. The payment date is important because all paid invoices in the advanced return for tax on sales and purchases as well as for the income statement are applied based on that date.
Note: The program is based on an actual-taxation, which is the case for most small businesses. For a target taxation a paid module must be acquired.
The payment status will not be printed with the bill/invoice.
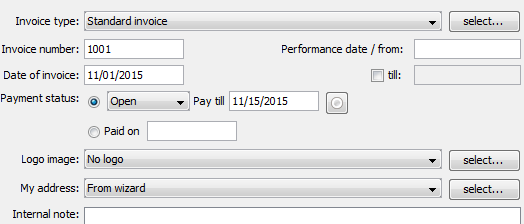
The field Logo image specifies what image is displayed as the logo on the invoice. The image can be seen on the bill on the top left. The logo can be selected directly from the list of available logos, or you can use the button "select ..." to choose a new logo.
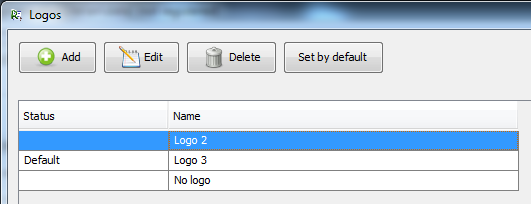
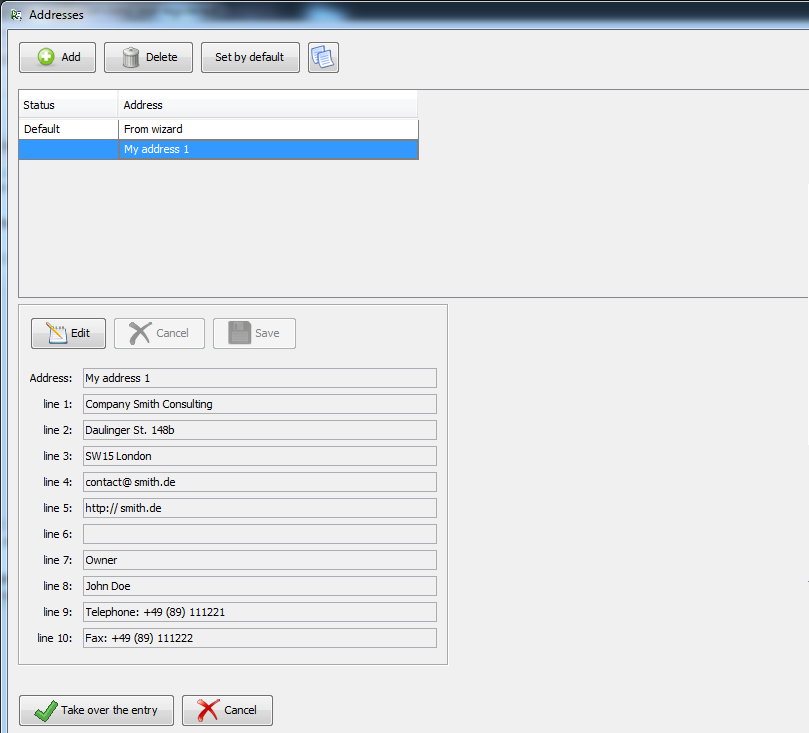
When clicking the button „select…“ next to the field, a new window opens up, in which information about the logo-image can be given. You can add new logo images, or change or delete existing ones. If you select an entry in the table, the associated information is presented below. By clicking on the "Edit" button you can change the information.
With the button "Set by default" the logo that is currently selected in the list is marked as default. Going forward this logo is now used in the creation of every new Invoice. By clicking the "Add” button, the selected logo image will be transferred to the invoice and inserted.
In the field My address you define the information for your own person/company. This information is inserted into the bill at top right. If you have several addresses, you can choose from a list. Or you can analogous to the logo image with the button "Select Edit open a new window, where you can maintain all your addresses.
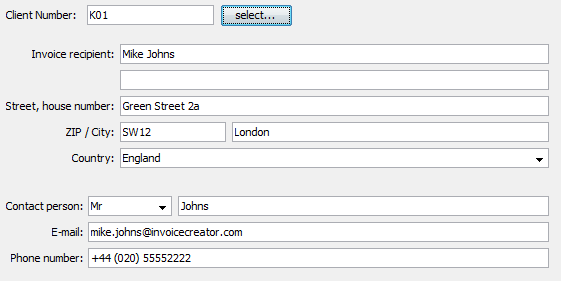
Furthermore, the bill recipient must be specified. By specifying a customer number in the Client number field a list of all in the program registered customers will be searched automatically.
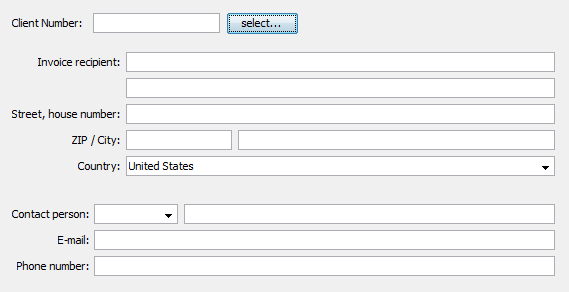
If a customer is available with the number, its data is copied into the fields below. If you manually modify the entries in the fields below, these changes only apply to this invoice. The entry in the list of clients remains unchanged.
The situation is different when you change not only the entries in the fields below, but also add a non-assigned customer number in the Client Number field. If now the bill is stored by a user action, a new entry in the customer list is created with the new customer number. This is true even if the lower fields are left completely empty.
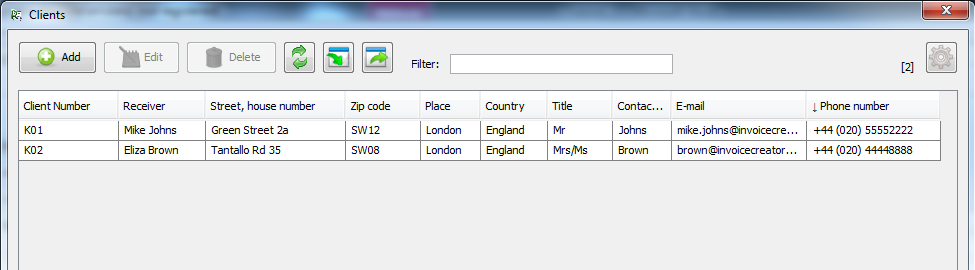
By pressing the “Select” button next to the field "customers" it opens the list of all customers - similar to the logo-images. Here you can add new customers as well as edit or delete existing ones.
If you enter a new customer, it is always advisable to assign a client number.
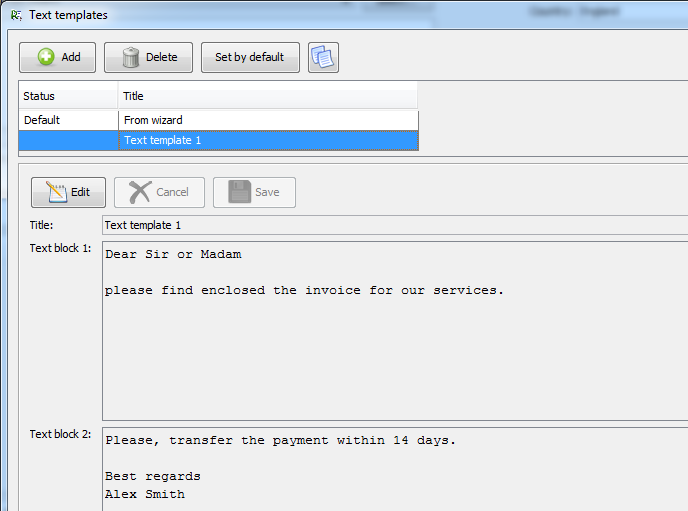
With the field Text template you specify the invoice text. The first part of the text is added above the invoice items on the invoice. The second part of the text is inserted below the table of the invoice items.
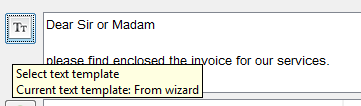
You can also select from a list of several predefined text templates. By pressing the button "Select ..." next to the field "Text Templates" you open the list of all pre-defined text templates - similar to the logo-images. Here you can also add new text templates and edit or delete existing ones.
For each invoice, the invoice text can be adjusted manually, without having to change the text template.

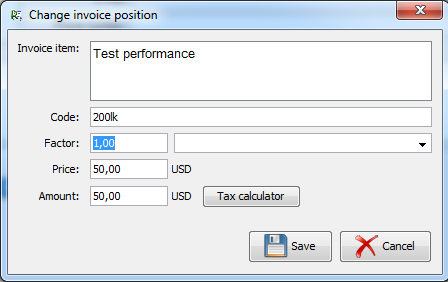
In the table with the invoice items, the products/services are listed, which are billed for. By clicking on the "Plus" button a window opens for adding an invoice item.
Here you can either create the name and price of a new product or a new service, or select an existing invoice item. When entering a new position, this position will be incorporated with the price into the list of already existing positions.
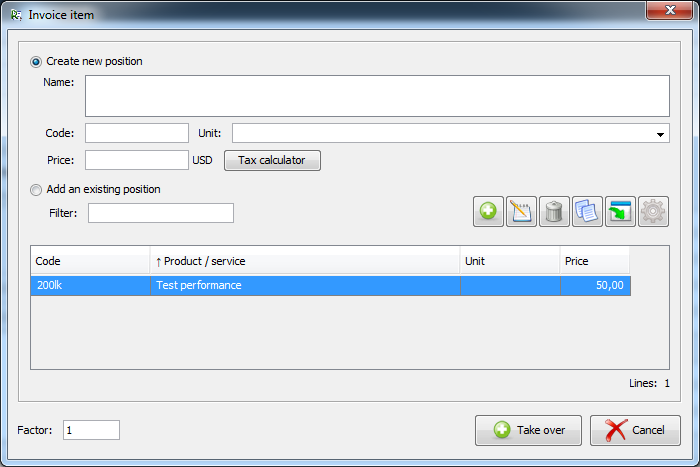
All the invoice items have a name, a factor, a price and an amount, whereas the amount shall be calculated by (factor * price).
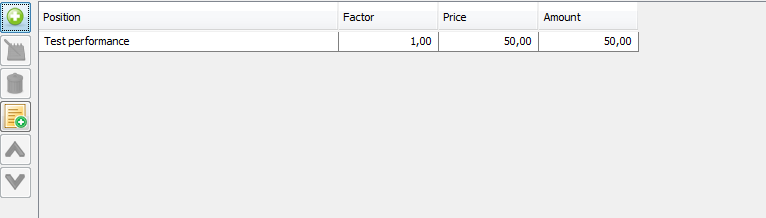
By double-clicking with the left mouse button on an invoice item in the table, or by clicking on the Edit button you will open a window. In this window you can edit and customize all information.
If an invoice item is added or changed, automatically the net amount is changed (the sum of the amounts of all invoice positions). This value is located in the Net amount field. If prices are to be given as gross amounts in the invoices, you have to adjust it accordingly within the program: Menu item "Settings -> My data -> Arithmetic figures -> Invoice items -> Gross price".
The Sales tax field specifies a tax rate. If the field is changed, automatically the Gross amount adjusts accordingly.
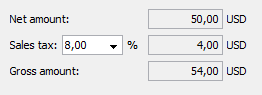
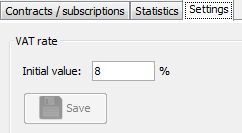
It is possible to specify a VAT rate with two decimal places. The initial sales tax is set at 8%, but it can be changed in the program settings ("Settings -> Invoices-> VAT rate").
The Method of payment field specifies how the invoice should be paid. The field will not be printed with the bill.
The Bank data field specifies on which bank account the invoice amount is intended to be received. This field is not printed in the current version with the bill.
The Purpose field indicates the intended use for a bank transfer. The pre-assignment of the field results from the invoice number and invoice date. The field will not be printed with the bill.
The Footer field specifies with which footer the invoice is printed.

Once all Information is taken, the invoice can be saved or printed.
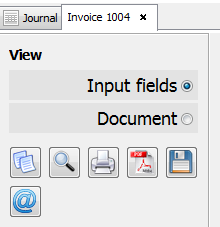
When switching to document view (through the button "Show document“ or the option "Document“) the invoice is shown as print preview.
There is the possibility in the program to rename the column names of the table with invoice positions, for that there is a menu item "Settings -> Invoices -> Invoice type".

By default, all prices are shown in USD. To select the default currency you have to choose the appropriate setting under "Settings -> My Data -> Arithmetic figures -> Currency".
It is certainly possible to change the page layout with programming skills. An explanation can be found in Tutorial 11: Customizing the invoice layouts.