 Invoice Creator
Note: this is a paid module that has to be activated in Invoice Creator. To activate it:
- Open Invoice Creator
- Click the menu item “Extras” → “Add-on modules” → “Install add-on modules”
- Click the “Buy module” button for the module
This module lets you record working hours for different projects and create invoices from them automatically. Once the module is activated, a new tab called “Time tracking” appears in the main window, with further tabs belonging to the module.
Working hours are entered on the first page, “Time recording”. It shows a table of all recorded hours, which can be filtered for all employees or a single employee. Enter a personnel number and, if the employee is found, the name is filled in automatically – or select the employee from the list and the personnel number is added. The table is updated as soon as you select another employee or change the period.
The period is set with “Month from”, “Year from”, “Month to” and “Year to”; only entries within this period are shown.
The data shown can easily be exported, printed or saved as a PDF file.
Each row of the table is a single time entry. Double-click a row to edit it, or click the plus button to add a new entry.
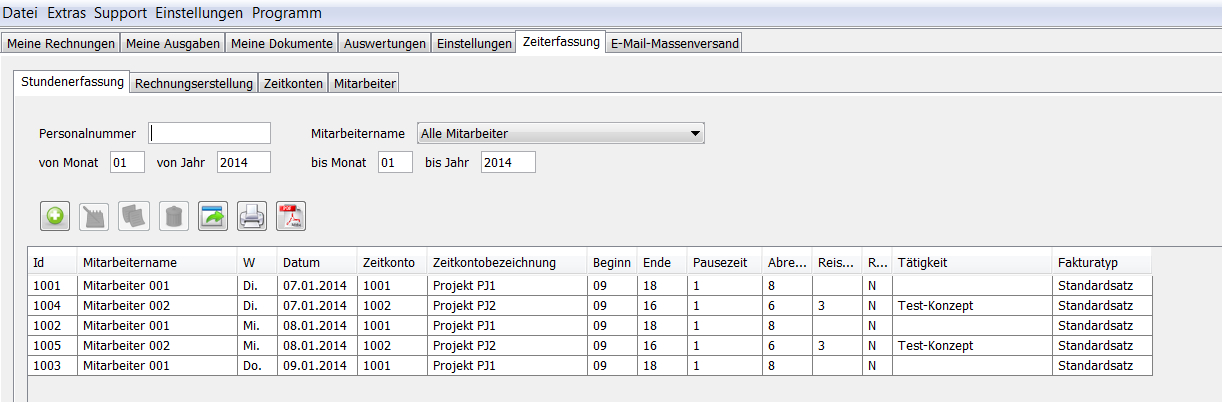
A window opens in which you enter the data for the new entry. First enter the date; the weekday is calculated automatically as a check.
In the “Time” section, enter the billable hours – the time actually worked. Alternatively, enter the start, end and length of breaks. Optionally you can add travel time or mark the entry as a flat-rate travel allowance.
In the “Billing” field you can choose: standard rate, front office, back office, no billing or fixed price. Different hourly rates can be stored for each of these in the settings.
Next, select a time account – the project to which the time is booked. Enter the account number and the name is shown automatically, or select the name from the list and the number is filled in.
Optionally enter an employee if you need to distinguish between employees; this field may stay empty. As with time accounts, enter a personnel number and the name is completed automatically, or choose the name from the list.
Finally, enter a description of the work.
When everything is filled in, click “Save” to store the entry.
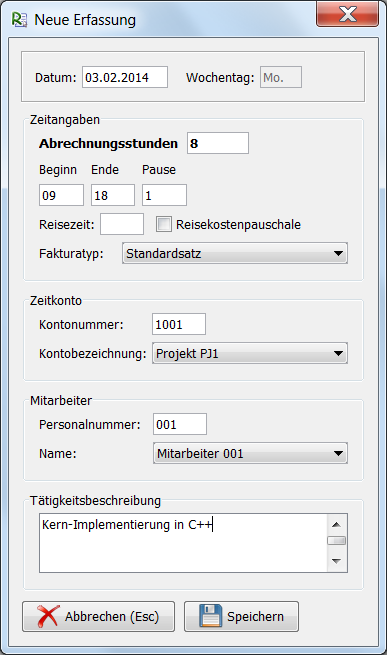
The entry now also appears in the table of all time entries if it matches the filter.
The “Time accounts” tab lists all time accounts. Here you can add new time accounts (= projects) and set their properties. Two accounts are predefined: “U” for holidays and “K” for sick leave.
The list of time accounts can also be exported, printed or saved as PDF. Double-click a row to edit an account.
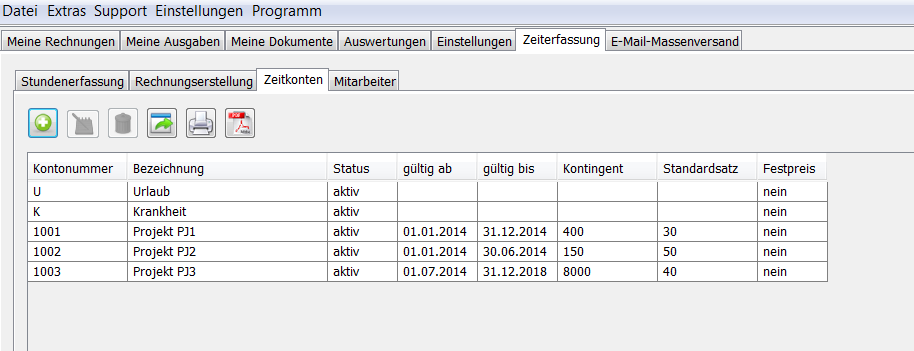
To create a new time account, click the plus button. A new window opens. First enter a unique account number, which may consist of digits and/or letters, then the name of the account. Each account can be marked as active or inactive under “Status”; hours can only be booked to active accounts.
Under “Time limit” you can set a valid-from and valid-to date; bookings are only possible within this period. Under “Quota” you can set the maximum number of billable hours. No more hours than defined here can be booked to the project – if you try, the program shows an error message. Next to it, “Already booked” shows how many hours have been booked so far and updates automatically with every new entry.
Under “Billing” you can enter different hourly rates – standard rate, front office or back office – or mark the project as a fixed-price project.
The “Further restrictions” section contains two settings: the maximum number of hours that may be booked to the project per day, and the maximum billable travel time per day in hours.
Under “Travel expenses” you can either enter an hourly rate for travel or a flat daily travel allowance.
Click “Save” to store the time account; new hours can then be booked to it.

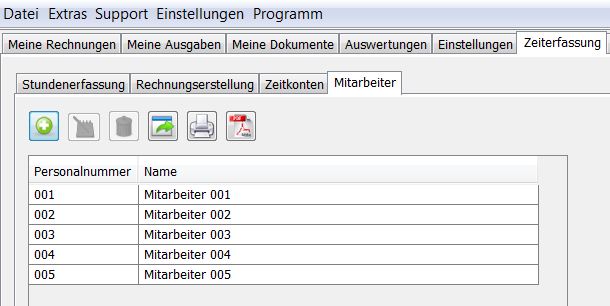
The next tab contains the list of employees. If you do not need to distinguish between employees or work alone, simply leave it empty.
The employee list can be exported, printed or saved as PDF.
The “Create invoice” tab is used to create invoices from booked hours. First select the relevant data: the period of work, then the time accounts. Click one account, or hold down the Ctrl key and click several rows in the table of time accounts.
The table below is filtered accordingly.
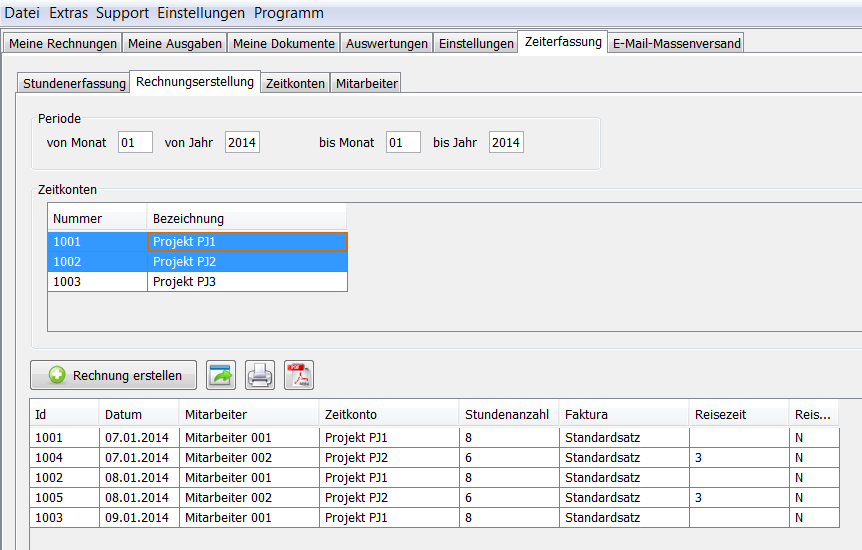
Now click “Create invoice”. The invoice is created and opened automatically in a new window. All hours are added as invoice items with the corresponding amounts, which result from the properties of the time accounts. Travel time or travel allowances are added as separate items.
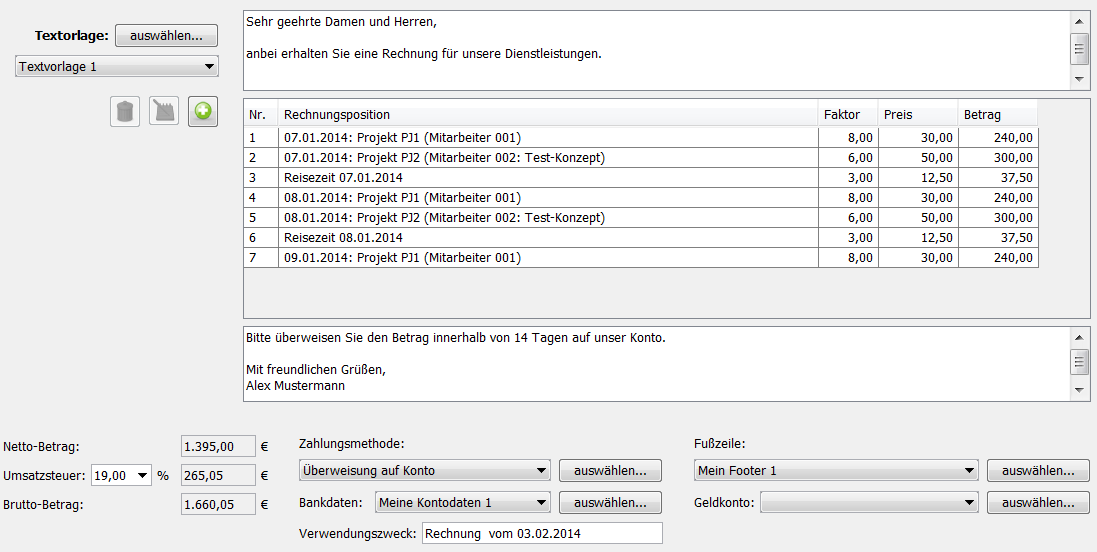
You can now save the document and switch to the document view.
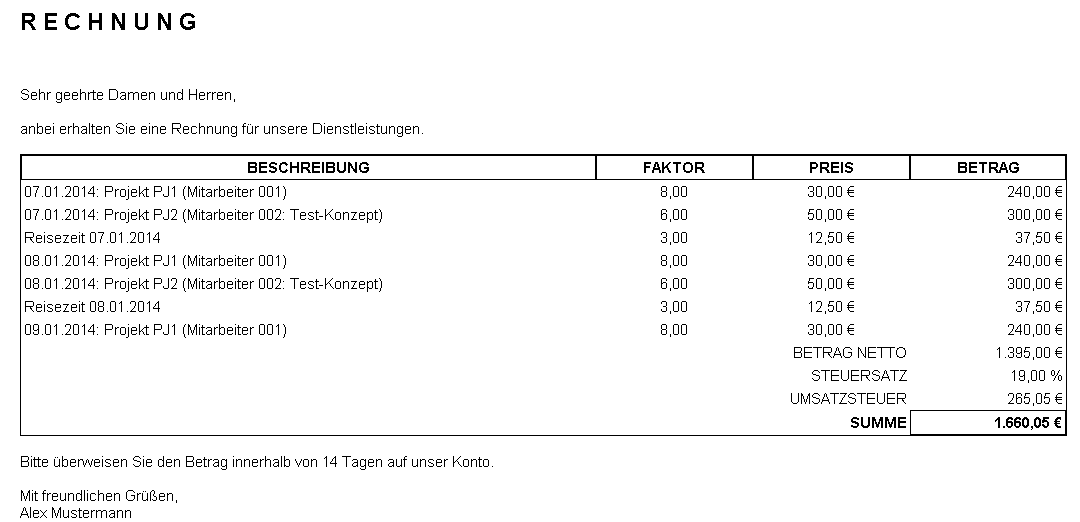
The invoice appears in print form, listing all booked working hours.