 Invoice Creator
Note: this is a paid module that has to be activated in Invoice Creator. To activate it:
- Open Invoice Creator
- Click the menu item “Extras” → “Add-on modules” → “Install add-on modules”
- Click the “Buy module” button for the module
With this module you can send a newsletter to all your customers. You can import your customers into the program from a CSV file.
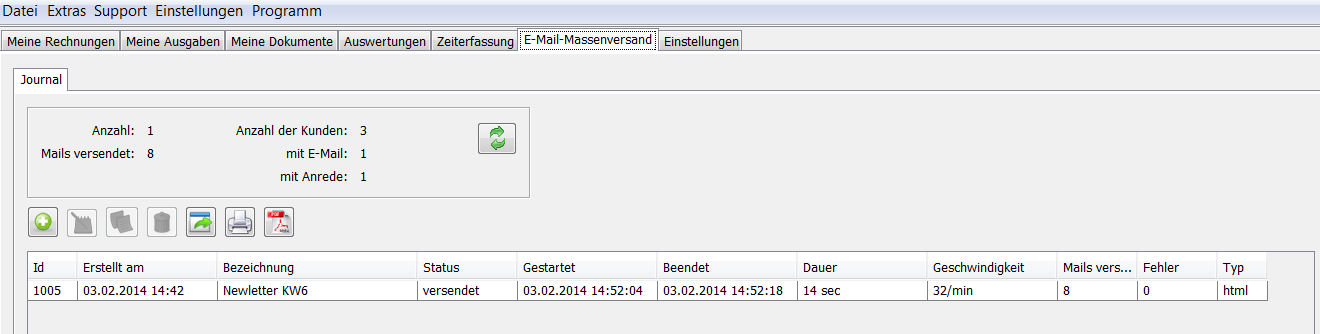
Once the module is activated, a new tab “Email mass mailing” appears in the main menu. It contains a table in which each row represents a mailing. The top of the form shows some statistics: the number of mailings and of emails sent, the number of customers and how many of them have a salutation and an email address. Customers without an email address cannot receive a newsletter by email.

To send a mailing, you first create it as an object in the program. Click the plus button and a new tab opens. The new mailing automatically gets a number and a creation date. The “Name” field can be edited freely. The mailing has the status “not sent”. You can leave a comment of any length in the “Comment” field.
The “Sender settings” section contains the settings of the email account used for sending: display name, email address, password, connection protocol, host and port. You get these details from your email provider; without them no mailing is possible.
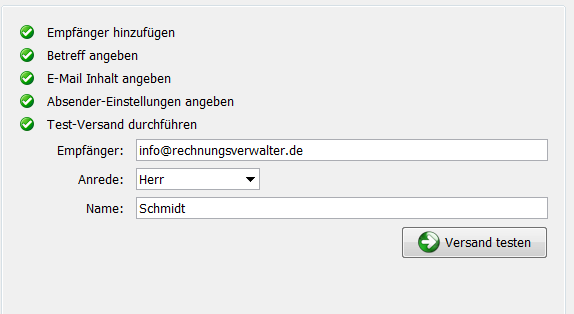
At the top right there is a list of the steps required before sending, each marked with a grey arrow. As soon as a step is done, it is replaced by a green tick. The following steps are required:
- Add recipients: there must be at least one recipient
- Enter a subject: the email subject must be filled in
- Enter the content: the mailing must have content
- Enter sender settings: no mailing is possible without a valid email account
- Send a test: for example, send a test email to yourself first to check the layout

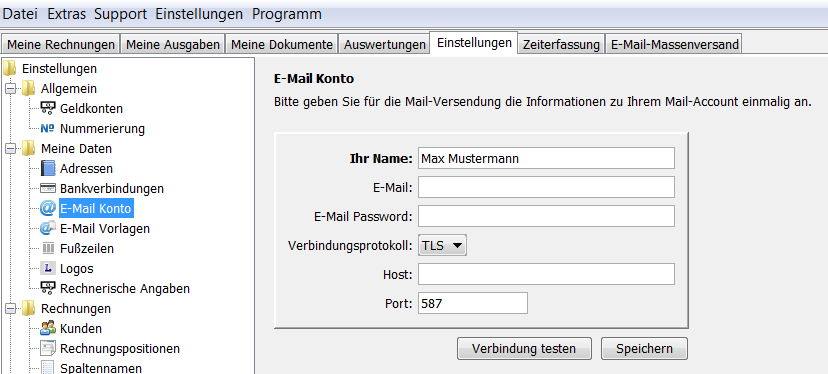
The sender's email account is the same as the one used for sending invoices and documents. It can be configured and tested under Settings → My data → Email account.
The “Recipients” tab defines who receives the mailing. There are two tables: the left one contains the email addresses the mailing is sent to. You can move recipients from one table to the other row by row, or all at once with the double arrows. The right table shows all customers with an email address who will not receive the message.
When you create a new mailing, all customers with an email address are selected and the right table is empty.
As with invoices and documents, you can use the variable !anrede! (salutation) in the email text. It is replaced dynamically when sending: if the recipient has no salutation and name, a general salutation is used; otherwise the salutation and name are inserted automatically.
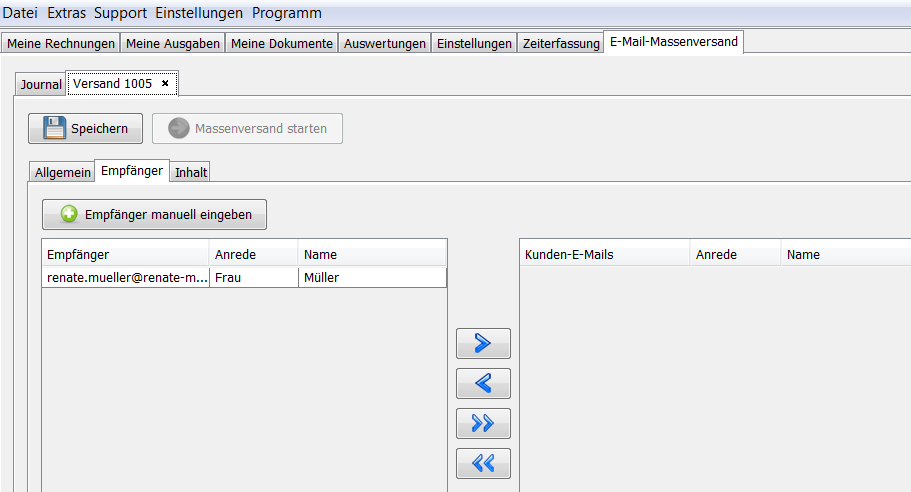
In addition to existing customers, you can also enter email addresses manually. Click “Enter recipients manually”.
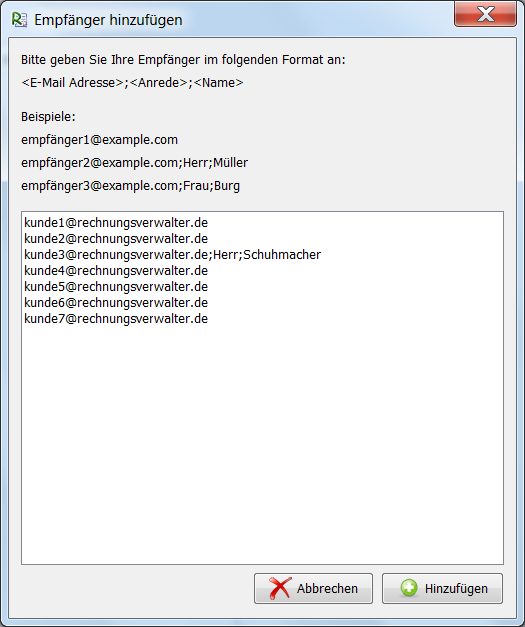
Add one email address per line. Optionally you can also enter the recipient's salutation and name in a special format, as shown in the picture below:
Email address;Salutation;Name
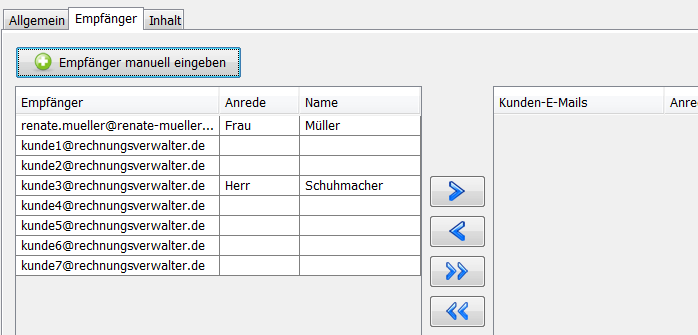
After clicking “Add”, the new email addresses are added to the left table.
The “Content” tab contains the subject and body of the email. You can choose between HTML email and plain text. Type the content manually, paste it from another document (Ctrl+C, Ctrl+V), or load it directly from a text file with the “Insert from file” button.

When everything is filled in and you return to the first tab, the completed steps are now marked with a tick.
It is recommended to send a test now. Enter the recipient's email address, salutation and name in the three fields and click “Test mailing”. An email with the given subject and content is sent.

If the test succeeds, the step “Send a test” is also marked with a tick.
Now click “Start mass mailing” and the emails are sent. At the end, a confirmation window shows how many emails were sent successfully and how many failed.

The journal now shows the mailing with the status “sent”, together with statistics on when it took place, how long it took and the average speed.
You can repeat a mailing at any time: select a completed mailing and click “Duplicate”, or open it and click “Repeat mass mailing”. A new mailing with the same parameters is created.
The journal gives you a clear log of all emails sent, with recipients and content.